 800-973-5506
 Help
Help Account
 Cart
Cart The engine control module (ECM) ensures that all your engine’s complex components work seamlessly. A damaged ECM can cause several issues. From poor performance and fuel economy to erratic running.
Once you have identified the ECM as the cause of your problems, replacing it is the only sure way to get your car running properly. In this article we show you the steps required to replace your own ECM successfully.
ECM Replacement Checklist
Replacing an ECM can be a costly exercise. That’s why it’s important to ensure that this is the part that is at fault.

- Diagnose the ECM using our handy guide – The symptoms of a failing ECM are similar to other issues like a faulty fuel system or starter motor. Use our guide here to narrow down the cause of your issues.
- Order a replacement ECM from Tom’s – OEM parts are always the best way to ensure your vehicle will work as intended. New ECUs can be extremely pricey, so order a quality used OEM part from Tom’s instead. Every ECM comes with a guarantee, too.
- Get the ECM reprogrammed for your vehicle – Usually required if your vehicle has an immobilizer or was built after 1996. This can be done by the dealer or a specialist.
Tools Required
Every make and model has its ECM in a unique location. Some are under the hood, but they can be inside the cabin as well. Check the service manual or look online to make sure before you start.
- Screwdriver set (both flathead and Philips)
- Socket set (10mm is the most common size)
- Pry tool
- Pliers
- Flashlight
- OBDII Scanner
You may not need all the tools mentioned above. But you don’t want to be hunting around the garage for a missing item halfway through an ECM replacement.
ECM Replacement Procedure
The ECM replacement procedure listed below applies to many Honda and Infiniti models. The basic steps are the same for most vehicles.
- Disconnect the negative battery terminal – the battery is under the hood. Some models – like BMWs – have the battery located in the trunk.
- Locate the ECM – most Hondas and Infiniti models have their ECMs in the front passenger footwell. You may need to remove the glove box and/or kick panel and gently pull back the carpeting to reveal it.
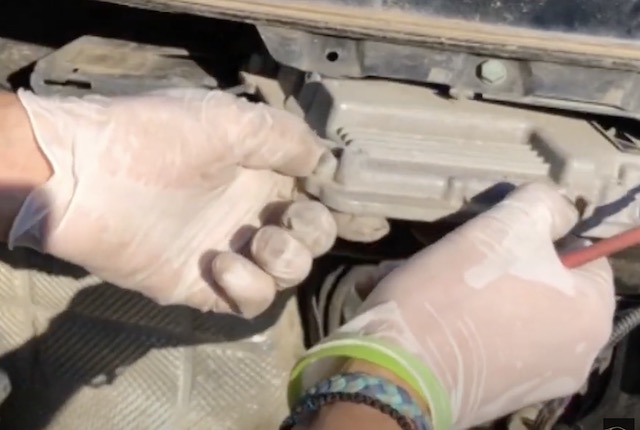
- Disconnect the ECM – The ECM will typically have several wiring harnesses connected to it. Some need a pry tool to loosen. Others have a clip that holds them in place.
- Remove the ECM – The ECM is secured to the bodywork with bolts and/or screws. Locate and loosen these to remove the ECM.
- Fit the replacement ECM – Follow instructions 4 to 1 in reverse to install the replacement ECM. (You may want to connect the harness first and check that everything is working correctly before bolting everything back into place.)
- Use an OBD II Scanner to test the ECM – Most models since 1996 will have an OBDII port. Earlier models may not need their ECMs reprogrammed to work.
- Test drive the car – If all is well, then the ECM was at fault. If the same problem persists, you may need to get the vehicle checked by a specialist.
OEM ECMs From Tom’s Foreign Auto Parts
Replacing your own ECM can save money on labor charges. Save even more by buying one of our quality used OEM ECM units. We offer a no-hassle 6-month money-back guarantee.
We stock thousands of ECM modules for many popular brands, including Honda, Infiniti and Toyota. Have questions? Contact us online for help finding your replacement ECM.

